Thursday, January 10, 2013
Monday, December 17, 2012
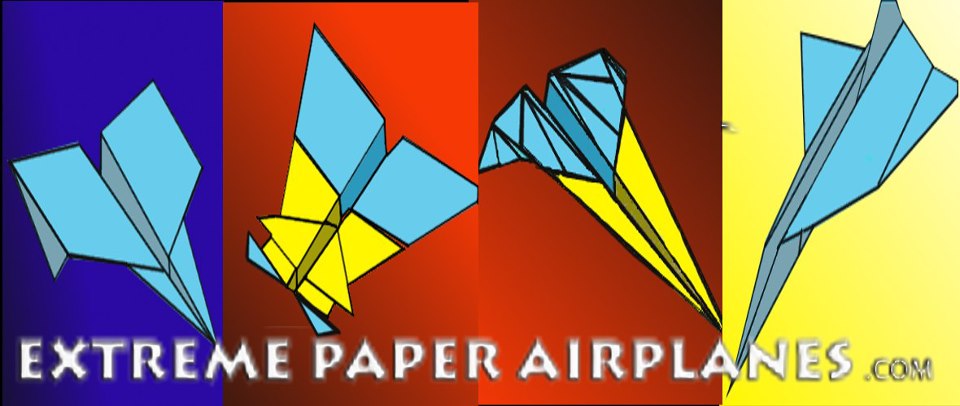
TOP 3: Minnow Paper Airplane
TOP 3: Minnow Paper Airplane

A wide winged delta with many extra control surfaces, this craft can be trimmed to glide or thrown hard for acrobatics.
VIDEO ON HOW TO FOLD THIS PAPER AIRPLANE IS AVAILABLE AT THIS LINK:
THIS WILL USE A
letter size sheet of light to medium weight paper
1. Make a crease to fold the paper in half. The crease line should go from the upper right corner of the paper to the lower left corner. This can be a bit tricky so take your time.
2. Rotate the paper around so the crease created previously is on the left hand side.
3. Fold the paper exactly in half, bringing the top point down to meet the bottom point. Unfold after the crease has been made.
4. Fold the left edge of the paper over. The width of the fold should be about one finger width. Be sure the crease is parallel to the left edge of the paper all the way from end to end.
5. Fold the left edge of the paper over again on top of itself. Be sure the new crease is parallel to the left edge of the paper. Make the crease as tight as possible.
6. Fold the upper right point down so the right half of the top diagonal edge lines up with the center line crease. The left point of the new crease should be at the middle of the top diagonal edge where the existing center line crease hits the edge.
7. Repeat on the left side. Fold the upper left point down so the top edge lines up with the center line crease. The right point of the new crease should be at the top edge where the existing center line crease hits the edge.
8. Make a crease to fold the right top-most flap over. The upper left point of the crease should be about two finger widths down from the tip of the nose and the new crease should be parallel with the right diagonal edge.
9. Repeat on the left side. Make a crease to fold the left top-most flap over. The upper right point of the crease should be about two finger widths down from the tip of the nose and the new crease should be parallel with the right diagonal edge. Be sure to line up the left and right sides for good balance.
10. Fold the tip of the nose down so the top point hits the center line crease. Make the new crease as close to the wing flaps as possible.
11. Flip the plane over and rotate it around so the nose points to the right.
12. Fold the plane exactly in half about the existing center line crease. Be sure to line up the sides for good balance. The paper in the nose section is so thick now that it may split apart a bit. This is normal.
Top 4: Eagle Paper Airplane
Top 4: Eagle Paper Airplane
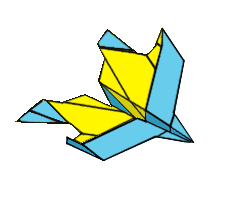
This complex looking jet is based on a new folding strategy and when complete, reminds of one of the F-4E Phantom II.
The Top 4 COOLEST PAPER AIRPLANE is Waiting for YOU...WANNA START MAKING THIS PAPER AIRCRAFT?
Start with a medium to heavy weight sheet of letter size paper.
1. Fold down the upper right corner so the upper right point hits the lower left point.
2. Rotate the paper around so the creased side is on the left and the paper opens up on the right side. Fold the top point down so it hits the bottom point. When folded correctly, all o the outside edges should line up.
3. Unfold all of the creases just made so the paper is completely open and is flat on the working surface.
4. Rotate the paper around so the longest diagonal crease goes up from left to right across the paper. Fold the top point (which does not have a crease going to it) down so it hits the bottom point.
5. Rotate the paper around so the creased edge is to the left and the paper opens up on the right. Fold the top point down so it hits the bottom point. When folded correctly, all of the outside edges should line up.
6. Unfold all of the creases you just made so the paper lays flat on the working surface.
7. Flip the paper over and rotate it around so the long edge of the paper is horizontal .
8. Fold the paper exactly in half along its long edge. Unfold after the crease has been made.
9. Flip the paper over and rotate it around so the short edge of the paper is horizontal.
10. Fold the paper exactly in half along its short edge. Unfold after the crease has been made.
WANNA CONTINUE MAKING THIS COOL PAPER AIRPLANE???VIDEO AND PRINTABLE PATTERN ARE AVAILABLE ALSO AT THIS SITE...
CLICK THIS LINK...
http://extremepaperairplanes.com/how-to-fold-the-eagle-paper-airplane
TOP 5: How to Make the ZEBRA Paper Airplane
TOP 5: How to Make the ZEBRA Paper Airplane

This paper aircraft is a canard flyer with real control surfaces near the nose which allow an extra measure of experimentation.
DO YOU WANT THE STEP BY STEP INSTRUCTIONS?????
HERE THEY ARE:
Start with a letter size sheet.
1. Fold the sheet exactly in half by bringing the long edges together. Make a tight crease and unfold when finished.
2. Fold the left edge over to meet the center line crease just formed. Make a sharp crease.
3. Repeat on the right. Bring the right edge over to the center line. Make a new crease and flatten.
4. Turn the sheet over from left to right. The flaps formed by the previous tow folds are underneath.
5. Make a corner crease by bringing down the upper right corner to the center line crease. The top edge of the paper should end up exactly along the center line crease.
6. Repeat on the left. Make a corner crease by bringing down the upper left corner to the center line crease. The top edge of the paper should end up exactly along the center line crease.
7. Make another typical paper airplane crease by bringing the corner on the right over to the center line crease. The diagonal edge formed from the previous corner crease should end up along the center line.
8. Repeat on the left side. Make the typical paper airplane crease by bringing the corner on the left over to the center line crease. The diagonal edge formed from the previous corner crease should end up along the center line.
9. Reposition the paper and turn it over so the flaps just created are underneath and the nose is pointed toward the top.
10. Open the left flap from the center line outward. Form a new crease which runs from the lower left corner up to a point about three finger widths from the tip of the nose. Press the layers flat
DO YOU WANT TO CONTINUE MAKING THE TOP 5 PAPER AIRPLANE???
FOLLOW THIS LINK...by CLICKING THIS LINK
Subscribe to:
Posts (Atom)